Friday, November 23, 2012

Leftover Turkey Ranch Quesadilla


Have some left over Thanksgiving Turkey? Here is a recipe for YOU! What more could you ask for after Thanksgiving Day then to get rid of some turkey and have a meal that only takes 10 minutes! This is a must try recipe and can easily be made any night of the week using left over rotisserie chicken, chicken breast or even pork loin.

Ingredients


         2 - 6 inch soft shell Taco shells
         1/2 cup of Turkey (Any chopped up chicken or pork loin would do)
         1/2 cup of Shredded Cheddar Cheese
         1/2 cup of Ranch Dressing (low fat, fat free or regular whatever you prefer)

         For A Spicy Ranch Turkey Quesdilla
***(other option 1/4 cup of Ranch Dressing and 1/4 cup of Taco Sauce)***

***(other option 1/4 cup of Shredded Monterey Jack and 1/4 cup of Shredded Cheddar Cheese)***
Directions and Photos

Step One
To a small mixing bowl add Turkey, Cheese and Ranch Dressing. (If doing the Spicy Ranch Quesadilla use 1/4 cup of Ranch Dressing and a 1/4 cup of Taco Sauce)
Turn your oven broiler on high. Stir the Quesadilla mixture together.
Spread the Quesadilla mixture onto one of the soft taco shell and spread within 1/4 inch from the edge of the shell.
This is what it should look like. (You don't want to spread it to the edge to far because when you go to cut the Quesadilla the mixture will spread to the edges.)
 Step Two
Place the Quesadilla under the broiler for about 1 minute just to warm the mixture/melt the cheese a little and warm other taco shell.
Leave your oven door open a crack to keep an eye on the Quesadilla. These will cook fast and can burn easily so do not take your eyes off of it!
After a minute under the broiler the cheese should be starting to melt a little like this and the other shell should be warmed.
Now take the other taco shell and flip it over onto the mixture to cover it.
Place the Quesadilla under the broiler again for 1 to 2 minutes until starting to brown. (All broilers are different and some cook faster. This is why you keep the oven door open and have to watch it.)
Once the Quesadilla starts to brown remove it from the oven and using a spatula flip the quesadilla over.
Place the Quesadilla back under the broiler for 1-2 minutes to brown the other side.
Once the other side is brown remove from the oven, cut, let cool for a couple minutes and serve!
(As you can see after cutting the Quesadilla the mixture has spread to the outer edges)


And there you have it...My family's favorite after Thanksgiving meal Turkey Ranch Quesadilla's!
 For more recipes and to stay up to date with new recipes being posted follow me here on Blogspot or on Pinterest!

Tuesday, November 20, 2012

My Thanksgiving Menu...

I ran out of time to do step by step instructions for all of my recipes I will be serving on Thanksgiving Day. So instead I decided to at least post my recipes. If you click on the links below they will take you to the recipes. Some of them I did have time to do step by step with photos and some I didn't. Don't be scared to try them tho...I try to keep things as simple as possible with simple ingredients you probably have in your cabinet already. I hope you enjoy these recipes as much as my family does. And if you don't have time to make them for Thanksgiving you can ALWAYS make them Christmas Day! (Or any day of the week!)


For the recipes above that do not have step by step instructions with photos...I will be doing that Thanksgiving Day. So if you prefer to wait and try some of these until Christmas they WILL have step by step instructions with photos...I PROMISE!

NO MORE Store Bought Mashed Potatoes!!

Please oh please tell me you do not buy store bought or boxed mashed potatoes! And if you do...that stops NOW! Here is my recipe for mashed potatoes with redskins in them. (A little...I absolutely hate going to a restaurant and getting 50% mashed potatoes and 50% red skins...You can completely take the skins off if you'd like!) I know, I know store bought is always so much easier but I guarantee once you try these you will no longer buy pre made mashed potatoes...HEY You might even save a little money not going to restaurants so often!

Pictured above includes Candied Carrots and you can find that recipe HERE!
 Ingredients

 This Recipe is for 2 people with a little left over!

      3 Red Skin Potatoes (I do 3 medium potatoes for every 2 people or 2 large but Red Skin Potatoes are usually medium size. If they are on the smaller size use 4 potatoes!)
      1 tsp of pre minced Garlic or 1 clove of fresh garlic grated or finely minced (no one wants to bite on a chuck of garlic!)
     1/4 to 2/3 cup of Milk (I used 1/2 cup but measure out 2/3 cup and use a little at a time. You can always add too but can't take back!)
     1/4 - 1/2 tsp of Black Pepper (I used half but it is to your preference)
     1/2  - 1 tsp of Adobo (I used 1 tsp but again it is to your preference of how much salt you want)
    
Instructions with Photos

Step One
Wash and peel the potatoes. If you do not want any red skins in your mashed potatoes then completely peel them. If you do I peel the potato all the way around, rotate it and peel down the center again.
The end product will have four strips of red skins.
Now cut the potatoes into 1/2 inch pieces.
Step Two
Place the 1/2 inch cut potatoes in a strainer and rinse. Place them in a pot and cover with cold water. Now add half of a handful of salt to the potatoes and put the pot of Hi heat.
(You want to add the salt to season the potatoes while the cook)
Bring the potatoes to a boil and continue to boil on Hi heat for 15 to 20 minutes. The potatoes will be cooked completely when you insert a fork and they start to MUSH. Remove from heat and strain.
Step Three
In a medium size microwave safe bowl add 2 TBSP of Butter and 1tsp of Minced Garlic (or 1 Clove of Garlic grated or minced) Place the bowl in the microwave for 45 second to a minute until butter is melted.
Add the strained potatoes to the butter and garlic. Measure out 2/3 cup of milk but only use about half to start. (You can add more after you have mixed it a little. Just add more milk until you have the mashed potatoes to the consistency that you like) Add the Adobo and Black Pepper.
Using a hand mixer. Mix the Mashed Potatoes and continue to add milk until the potatoes are to the consistency that you like.

Step Four
Serve and ENJOY! And please...NO MORE store bought mashed potatoes!!!
(If you are making this with your thanksgiving meal. I would start to boil the potatoes when you take the Garlic Butter & White Wine Turkey out of the oven and when you put then Au Gratin Green Bean Casserole and Candied Carrots in the oven!)


 You can follow me here on Blogspot or on Pinterest to stay up to date with all my Step by Step Recipes!


Candied Carrots

This is a recipe that My Mother would ALWAYS make for Holiday Dinners. (honestly the only way I would eat cooked carrots) If you have kids that are stingy about eating vegetables then you must try this recipe. What kid doesn't love brown sugar and butter? And if that doesn't work you can always try what My Grandma May would tell us..."Carrots make you eyes sparkle" I can tell you My Brother ALWAYS ate his carrots...and spent many hours in front of our bathroom mirror watching his eyes *SPARKLE*

Ingredients
1 lb of Baby Cut Carrots
3 TBSP of Melted Butter

3 TBSP of Light Brown Sugar

THAT'S IT!
Directions

Step One
Place Carrots in a pot and cover with cold water.
Place the pot on the stove over Hi heat. Bring to a boil. Once brought to a boil, boil for about 10-12 minutes until fork tender. (You do not want to over cook them to a mushy stage. They will cook longer in the oven.) Once fork tender strain in a strainer.
Step Two
Now take you 3 TBSP of Butter (melt it first) and 3 TBSP of Light Brown Sugar and add to a shallow 9 inch square baking dish. (You want the carrots to be in a single layer.)
Mix the Brown Sugar and Butter together.
Add the strained carrots and using a spatula fold the carrots around in the brown sugar and butter mixture.

Step Three
Cover with tin foil (so the carrots can continue to steam and finish cooking in the brown sugar and butter.) And bake at 350 degrees for 25 to 30 minutes.

(If you are making these with your Thanksgiving meal when you remove your Turkey from the oven to rest, this is when you will put you carrots and Au Gratin Green Bean Casserole in the oven)

Step Four
After 25 - 30 minutes in the oven remove from the oven and remove the tin foil (CAREFULLY the steam can burn you) Stir the carrots around to coat them with the brown sugar and butter...
...And Serve!


I hope you and your family enjoy this recipe for you next Holiday or Family dinner. I know how much my family loves it! You can follow me here on blogspot or on Pinterest to stay up to date with all my recipes!


Garlic Cheddar Biscuits (Recipe)

This is my recipe for biscuits I think are similar to Red Lobsters Cheddar Bay Biscuits. I love to make these on Thanksgiving day because I think they pair well with my Au Gratin Green Bean Casserole and Garlic Butter & White Wine Turkey. I hope you enjoy them as much as I do!

 Ingredients

Garlic Cheddar Biscuits
     2 1/2 cups Bisquick
     1/2 tsp of Adobo (Spanish seasoning without pepper)     
     3/4 cup cold Buttermilk
     4 TBSP cold Butter   
     1 cup Cheddar Cheese, shredded
 

TO BRUSH ON TOP:

     2 TBSP of Butter
     1/2 tsp dried Parsley
     1/2tsp of Adobo (again the Spanish seasoning without pepper)

Directions

Step One
Preheat oven to 375 degrees. In a large bowl mix the Bisquick, Adobo and Cold Buttermilk together until combined. Cut the 4 TSBP of butter up into small (half of a pea sized) pieces (they will melt inside the biscuit...AMAZING) and add to the bowl. Then add the Shredded Cheddar Cheese and fold it in until WELL combined.

Step Two
Using two spoons take about a 1/4 cup portion and drop onto cookie sheet. (You do not want to roll out these and use a biscuit cutter. The biscuits at Red Lobster are drop biscuits. And it's just less mess to do it this way!) You should have enough to make about 12 biscuits.

Step Three 
Bake in 375 degree oven for 13 to 17 minutes. (Depending on how fast your oven usually bakes things.) I would just check the biscuits to make sure they don't get too brown. You want them to be golden. 

Step Four
While the biscuits are baking take a small microwave safe bowl add the 2 TBSP of Butter, 1/2 tsp of Dried Parsley Flakes and 1/2 tsp of Adobo. Place in microwave for about 30-45 seconds until butter is completely melted. When Biscuits are fresh out of the oven stir the butter mixture up so all the seasoning isn't on the bottom and either spoon or brush over the biscuits. Serve hot and enjoy!


Italian Corn

Every time I post about my Italian Corn people ask me...WHATS THAT? Well here it is...my recipe for Italian Corn. With a couple extra ingredients it turns ordinary canned corn into corn full of flavor. A must try on your holiday menu!
Ingredients
 1 - 15 oz can of Whole Kernel Sweet Corn (do not drain)
2 TBSP of Butter
1/4 tsp of dried Italian Seasoning
1/4 tsp of dried Parsley Flakes
1/2 tsp of Adobo (spanish seasoning without pepper)

Directions
Step One
Empty the whole can of corn into a small microwave safe bowl. Microwave on 100% for 2 minutes.
 Remove from microwave and strain in strainer.


StepTwo
After straining add half the corn back into the microwave safe bowl.
Add 1 TBSP of Butter, 1/4 tsp of Italian Seasoning, 1/4 tsp of Parsley Flakes and 1/2 tsp of Adobo.
Now add the remaining half of the corn to the bowl and top with the last TBSP of butter.
Place back into the microwave for 30 seconds at 100% power. And remove from microwave.
Step Three
Stir the Italian Corn to mix all the ingredients together and serve.

And there you have it...My Recipe for Italian Corn! Please continue to follow me on Blogspot or on Pinterest to stay up to date with all my recipes!

Au Gratin Green Bean Casserole

This is my recipes for my Au Gratin Green Bean Casserole. Similar to a regular Green Bean Casserole with a couple extra ingredients to kick it up a little! I promise you make this as a side dish for your Thanksgiving meal and it may become someones main dish (ex: me)!


Ingredients
1 - 10.5 oz can Cream of Mushroom Soup
1 cup of Milk
1/2 tsp of Adobo
 1/4 tsp of Black Pepper
2  - 14.5 oz cans of Cut Green Beans, drained 
1 1/2 cups of Shredded Cheddar Cheese (divided)
1 1/2 cups of French Fried Onions(divided)

Direction
If making this on Thanksgiving Day you can make this an hour or so in advance. When you remove the Turkey from the oven to rest for 30 minutes that is when you will put the Casserole in the oven. If making this any day of the week for dinner you will want to preheat your oven to 350 degrees while mixing all the ingredients together!

Step One

Take the can of Cream of Mushroom soup and add to a medium sized mixing bowl.
Take the empty can and fill 3/4 of the way with milk or you can use a 1 cup measuring cup.

Pour half the milk in the bowl and whisk together. Once well combined add the rest of the milk and whisk together.
Once well combined, add 1/2 teaspoon of Adobo and 1/4 a tsp of Black Pepper.
Step Two

Take the 2 - 14.5 oz cans of Green Beans and drain in a strainer.
Add the strained Green Beans to the bowl and fold them in with the soup mixture.

Now take 1 cup of Shredded Cheddar Cheese, add to the bowl.
Fold in until well combined.
Now take 1 cup of French Fried Onions, crunch in your hand and add to the bowl. (sometime there can be large pieces...I crunch them up in my hand so you get bite size pieces throughout the casserole and not large piece here or there)
Fold in until well combined.

 Step Three
Now take the casserole mixture and pour into the 9x13 inch casserole pan or into a 9 inch square pan.
Place the Casserole uncovered into the 350 degree oven for 30 minutes.
 Step Four
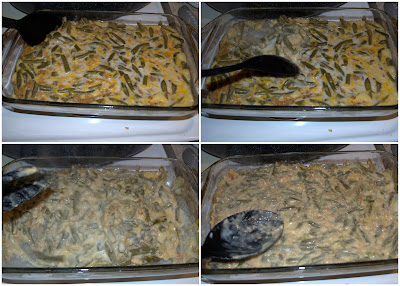
Remove the casserole from the oven.
Using a spoon or spatula fold the Green Bean Casserole to mix the mixture up again.
Now take the other 1/2 cup of Shredded Cheddar Cheese and sprinkle all of the top of the casserole.
Now take the other 1/2 cup of French Fried Onions, crunch in your hand and sprinkle them on top of the layer of cheese.(most casseroles only have you sprinkle them around the edge of the casserole) I LOVE French Fried Onions so I sprinkle them all over the top of the casserole so everyone gets that crunchy goodness!
Now take the casserole and place back in the 350 degree oven for 5 to 10 minutes until the cheese layer is melted and the French Fried Onions are light brown in color and crispy.


Step Five

After 5-10 minutes remove from oven and let stand for 10 minutes before serving.
After letting the casserole stand for 10 minutes serve your Au Gratin Green Bean Casserole with the rest of My Thanksgiving Feast...Garlic, Butter and White Wine Turkey, No More Store Bought Mashed Potatoes, and Garlic Cheddar Biscuits! I hope your family enjoys this with your Thanksgiving Feast or with dinner any day of the week like my family does!


You can continue to follow me here on Blogspot or on Pinterest to stay up to date with all my step by step cooking recipes!